Lighting can be integrated into wooden sauna panels by routing LED strips into purpose-cut channels or grooves along panel profiles, creating indirect, ambient illumination that enhances the sauna atmosphere without exposing fixtures to direct heat or moisture. The key is choosing sauna-rated components and positioning them where heat and steam are least intense. The sections below address every practical question you need to answer before planning your sauna lighting project.
What types of lighting work inside a sauna?
LED lighting is the most suitable choice for sauna interiors. Low-voltage LED strips rated for high-temperature and high-humidity environments can withstand the demanding conditions inside a sauna, including temperatures that routinely exceed 80°C and significant moisture exposure. Fiber-optic systems are another proven option because the light source itself sits outside the sauna, eliminating electrical components from the hot zone entirely.
Traditional incandescent or halogen bulbs are generally unsuitable. They generate too much additional heat, their fittings rarely meet the IP (Ingress Protection) ratings required for wet and steam-filled spaces, and their lifespans drop sharply under thermal cycling. Compact fluorescent lamps face similar limitations and can crack under rapid temperature changes.
When selecting LED products specifically, look for strips or fixtures rated at minimum IP65 for damp areas or IP67 and above for zones directly exposed to steam. Purpose-built sauna luminaires, designed with heat-resistant housings and sealed connections, are available from specialist suppliers and represent the safest starting point for any sauna lighting integration project.
How can LED strips be hidden inside wooden panels?
LED strips are hidden inside wooden sauna panels by routing a channel or rebate into the back or edge of a panel profile, then recessing the strip into that groove so only the emitted light is visible. The channel depth should match the LED strip’s profile, keeping the strip flush or slightly recessed so it does not protrude and create a hot spot against adjacent wood.
There are two common approaches to concealment. In the first, a shadow gap or reveal is created between two panels, and the LED strip sits in a channel cut into the edge of one panel, projecting light across the wall or bench surface. In the second, a purpose-milled profile panel incorporates an integrated groove on its face or underside, with a diffuser channel that scatters light evenly and prevents visible hot spots along the strip.
Cable management is equally important. Wiring should be routed through drilled passages in the panel framing or behind the panel battens, keeping all connections and junction points outside the sauna or at least below the bench level where temperatures are lower. Silicone-insulated cables rated for high-temperature use are essential; standard PVC-insulated wire degrades quickly in sauna conditions.
What sauna panel profiles are best suited for lighting integration?
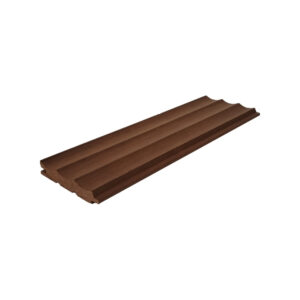
Tongue-and-groove panels with a wider face board and a pronounced shadow gap between boards are best suited for sauna lighting integration. The shadow gap creates a natural recess where an LED strip can sit invisibly, directing light along the wall surface without any additional milling. Panels with a stepped or beveled edge profile achieve a similar effect while adding visual depth to the wall finish.
Purpose-designed LED channel profiles, sometimes called light-rail panels, take this further. These panels include a factory-milled groove sized precisely for a standard LED strip and an optional diffuser slot, delivering a clean, professional result without site modifications. For builders and designers who want a turnkey solution, these profiles eliminate guesswork around channel dimensions and diffuser fit.
Thicker panel stock, typically 15 mm or above, gives more material to work with when routing channels without compromising structural integrity. Thinner panels can be channeled, but care is needed to avoid weakening the tongue or groove joint. Aspen and black alder, both core materials in our wood products for sauna panels, machine cleanly and hold routed edges well, making them particularly practical choices for lighting-integrated applications.
Where should lighting be positioned in a sauna for best results?
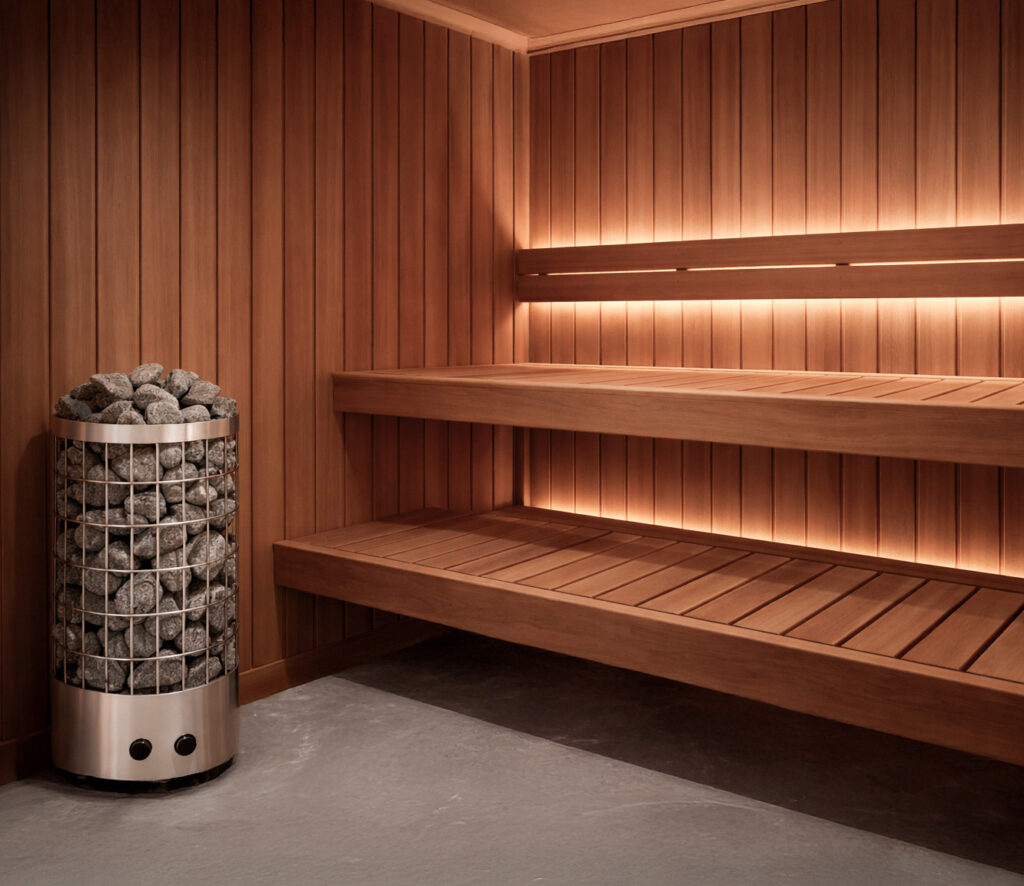
The most effective sauna lighting positions are below the benches, along the lower wall panels, and behind the backrest panels. These locations keep light sources away from the highest heat zones near the ceiling, protect fittings from direct steam exposure, and produce a warm, diffuse glow that feels relaxing rather than harsh. Positioning lights low also emphasizes the natural grain and texture of the wooden panels.
Below-bench lighting is the most popular choice for good reason. It creates a floating effect, makes the sauna feel more spacious, and keeps all electrical components in the coolest part of the room. Light directed upward from this position washes the wall panels in soft illumination, highlighting the wood’s natural character.
Backrest panel lighting, where strips run horizontally behind the upper bench backrest, adds a secondary layer of ambient light at mid-height. This zone sits below the ceiling heat peak and above floor-level moisture accumulation, making it a practical middle ground. Ceiling-level lighting is possible with fiber-optic systems, since the source unit is remote, but standard LED fixtures should generally be avoided at ceiling height due to sustained high temperatures in that zone.
What safety requirements apply to electrical installations in saunas?
Electrical installations in saunas must comply with national electrical safety standards, which in most European countries follow IEC 60364-7-703 or equivalent national adaptations. This standard divides the sauna into temperature zones and specifies which types of electrical equipment are permitted in each zone. Only equipment specifically approved for sauna use, with appropriate IP ratings and temperature tolerances, may be installed in the hottest zones.
Key requirements that apply in practice include the following:
- All wiring must use heat-resistant cable, typically rated to at least 170°C, with silicone insulation preferred over PVC.
- Fixtures in the upper sauna zone must be rated for surface temperatures up to 125°C or higher, depending on the standard applied.
- Low-voltage systems (12 V or 24 V DC) are strongly preferred over mains-voltage installations inside the sauna room itself.
- Transformers, dimmers, and drivers must be located outside the sauna or in a ventilated cabinet below bench level where temperatures are manageable.
- A residual current device (RCD) with a 30 mA trip threshold must protect all sauna circuits.
Always engage a qualified electrician familiar with sauna-specific regulations in your country. Requirements vary between jurisdictions, and non-compliant installations can void insurance, create fire risk, and pose serious safety hazards. Documentation of the installation, including product datasheets confirming the temperature and IP ratings of all components, is good practice and may be required for building inspections.
Can lighting affect the longevity of wooden sauna panels?
Poorly installed lighting can shorten the lifespan of wooden sauna panels, but correctly designed and positioned lighting has minimal impact on panel longevity. The two main risks are localized heat buildup from LED strips in contact with wood, and moisture ingress through cable penetrations or poorly sealed channels. Both risks are manageable with proper installation practice.
LED strips generate some heat, and when pressed directly against wood in a tightly routed channel without airflow, that heat accumulates. Over time, repeated thermal cycling can dry out the wood immediately around the strip, causing localized cracking or discoloration. Leaving a small air gap between the strip and the channel wall, or using aluminum channel profiles as heat sinks, distributes this heat and protects the surrounding timber.
Moisture is the more significant long-term concern. Any penetration through a panel for cabling creates a path for steam and water vapor to reach the back of the panel or the wall structure behind it. Sealing cable entry points with heat-resistant silicone and ensuring the panel system has adequate ventilation behind it prevents moisture from accumulating. High-quality panel materials, particularly heat-treated aspen and black alder, offer enhanced dimensional stability and resistance to the repeated wetting and drying cycles that characterize sauna use, making them a sound foundation for any lighting integration project. Contact us for sauna panel advice to discuss the right materials and specifications for your project.